To translate display text into another language, use this procedure and the editor that is provided with Blueworx Voice Response. To translate help text, use the procedure that is described in Using Blueworx Voice Response to translate help text. To export display text to an ASCII file that you can edit with a different editor, use the procedure that is described in Copying display text to an ASCII file on the hard disk.
Some PTFs provide new display text. If you notice unexpected text, such as oamui.enable_button, after applying PTFs, you must translate the new display text.
Procedure
- From the Welcome window, select Configuration —> Languages.
- Displaying text to translate: Open the
language into which you want to translate display text.
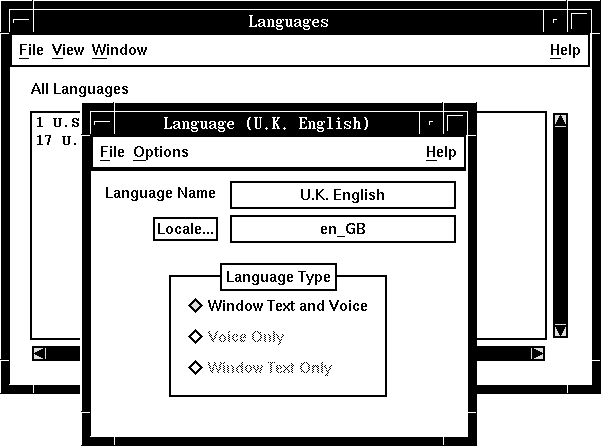
The system displays the Language window.

- Click Options.
- Click Language String Editor.
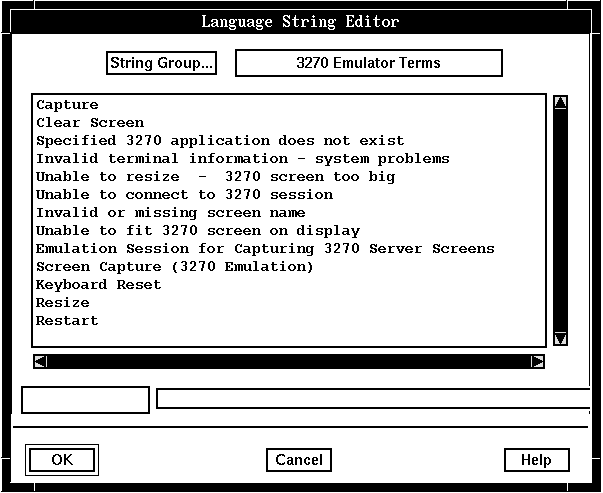
The system displays the text that is in the first group of terms in the system.

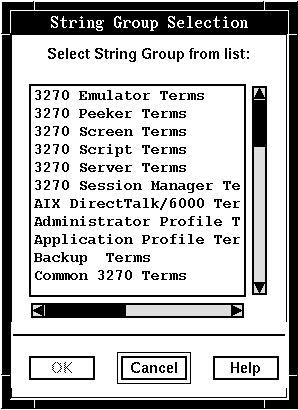
- Displaying different text to translate: Click String Group....
The system lists all the groups of terms in alphanumeric order, starting with groups whose names begin with numbers.

- Click the group that includes the text that you want to translate.
- Click OK.
The system lists the text for all terms that are in the selected group. The terms are listed in alphanumeric order, starting with terms that begin with a number.
- Translating the text: Click the term
that you want to translate.
The system copies the term to the edit field that is at the bottom of the window. The field is relabeled with the internal tag that Blueworx Voice Response uses to recognize the term.

- Type a translation of the term in the edit field.
- Translating more text: To save the translation and translate more terms, repeat Steps 5 through 9 or Steps 7 and 9 until you are finished.
- Click OK.
The system displays the Language window.
- Saving and Closing: Click File —> Save.
- Click File —> Close.
The translated terms are saved in the database for the selected language.