Use this procedure to add IDs and descriptions of new voice segments to a voice directory:
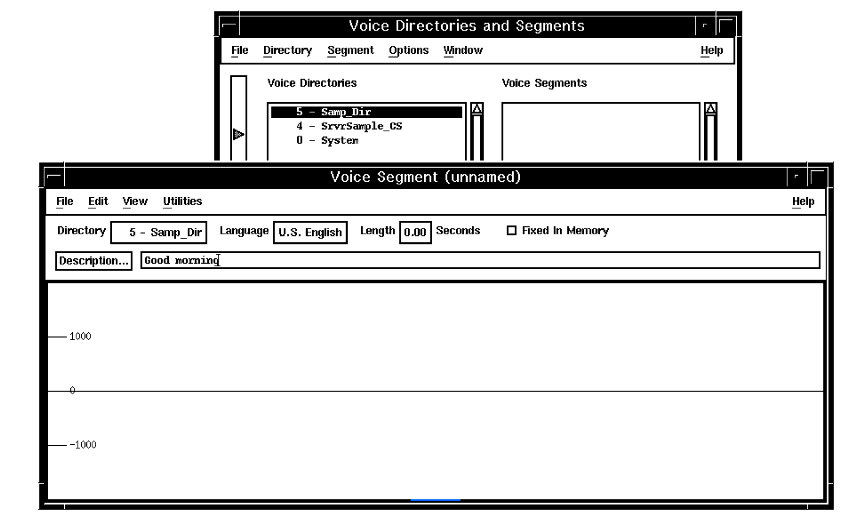
- From the Welcome window, click on Applications —> Voice Segments. The Voice Directories and Segments window appears.
- Define a new segment: To define a new segment, select the language and directory for the new voice segment.
- Click Segment —> New.
The system displays the Voice Segment window for the new voice segment.

- To enter a description of the segment, either:
- Click the Description button and type a description of what the segment will say. Using the exact words that the voice segment speaks can be very helpful when you record the voice segments later. Click OK.
- Or, if the description is short, type the new description at the cursor in the Description field.
- Select the check box next to Fixed In Memory if you want the segment to stay in the cache once loaded for a prompt. Use this if the segment is large and would play for longer than the maximum time in cache.
- To save the new voice segment, click File—>Save.
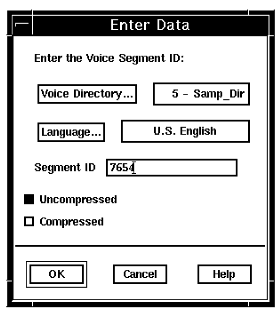
The system displays the Enter Data window

- To change the voice directory for the segment, click Voice Directory.
- To save the voice segment to another language database, click Language to select a different language.
- Type a unique numerical identifier for the voice segment in the Segment ID field.
- Select Uncompressed or Compressed, or both, to specify the format in which the segment is to be saved. At least one of these buttons must be selected to successfully save the segment.
- Click OK.
The segment is saved and the segment ID and compression format are shown in the Voice Segment window title.
- Close the Voice Segment window.
The Voice Directories and Segments window displays the new segment. An asterisk (*) next to the description indicates that the segment does not contain audio data.
- More?: Repeat this procedure, starting with Step 3, for the next new voice segment.