Before you start, see the note on Using the applications and application windows.
- From the Welcome window, click on Applications —> Applications
- Naming the application: Click Application —> New.
The system displays the New Application window.
- Type in the name (up to 15 characters) and, optionally, a description (up to 255 characters). The name must be unique.
- Click Create.
The name of the new application is displayed in the Applications window and a new Application window opens automatically.
- You can now either move or copy existing objects into the application, or create new objects within it.
- Moving an object: Open both the source and target Application
windows. Note: It does not matter whether there is a folder for the type of object in the Application window, because folders are created automatically by the system; and it does not matter which folder you drop the object into, because the system makes sure it goes into the right one.
- Click an object in the source Application window and drag it,
using mouse button 2,
to the target Application window.
The object is moved to the target Application window, and displayed in the appropriate folder.
Note: If you drag an object from the Object Index window into an Application window, the object is not removed from the Object Index window, but the application name is changed. The object appears in the target Application window. - Moving multiple objects: Click multiple objects of the same type (in the same folder): you can either select adjacent objects by dragging down them using mouse button 1, or you can add objects to the selection by holding down the Ctrl key while clicking with mouse button 1.
- Drag them, using mouse button 2,
to the target Application window.
The objects are moved to the target Application window, and displayed in the appropriate folder.
- Copying an object: Click the object in the source Application
window and drag it, using mouse button 2 +
Ctrl, to the target Application window.
Because you cannot have two objects with the same name, the system asks you for a new name.
- Type in the name. The name must be unique.
- Click Copy.
The new object is displayed in the Application window.
- Creating a new object: Click Object —> New.
- Click the type of object you want to create.
The system displays the container window for that type of object, followed by the editing window.
- Create the contents of the object, validate if necessary, and
save it. Refer to the Blueworx Voice Response for AIX:
Application Development using State Tables information for
detailed procedural and reference information, or use the online help.
When you click View —> Refresh Now, the new object is displayed in the Application window.
Note: If you create a new object within the Object Index window, the object is stored in the Default application and displayed in the Application (Default) window. - Creating more objects: You can create further objects of the same type by repeating steps 13 and 14, or by clicking New from the appropriate menu in the container window.
- Displaying dependent objects: Click an object and then
click Dependencies from the object's
popup menu.
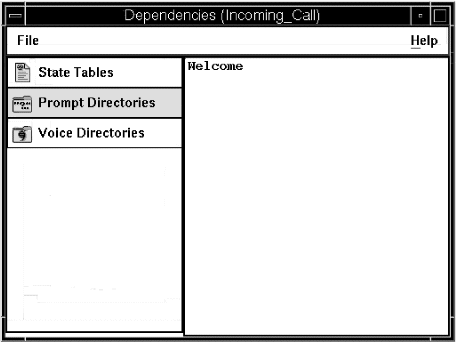
The system displays the Dependencies window:

What is a dependency?: A dependency is an object that is necessary for another object to run correctly.For example, prompt directory B becomes a dependency of state table A when you specify it as the prompt directory in state table A. Blueworx Voice Response cannot find all of the dependencies if variables are used to name them (for example, InvokeStateTable by variable).
To run a state table on a development system, it is not necessary to include all dependencies in the same application. Provided that all the dependencies are actually present, the state table can be run. But, before you export the state table to another system, you should check that the state table and all its dependencies (other state tables, prompts, voice segments, and so on) are present on the target system, whether in this application or in another one, for example, a common application.
- Adding application prerequisites: Click Application
Prerequisites from the application's popup menu.
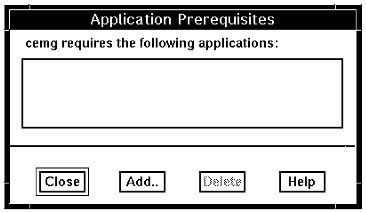
The system displays the Application Prerequisites window.

What is an application prerequisite?:An application prerequisite is another application that contains objects that are necessary for the application to run. After you've traced all the dependencies of the objects in your application, you can add the applications that contain them to the Application Prerequisites list. (When you export the application, the system asks you if you want to export the prerequisite applications too.)
- Click Add to add applications.
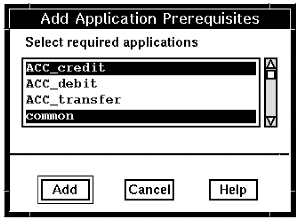
The system displays the Add Application Prerequisites window.
- Click one or more applications.

- Click Add.
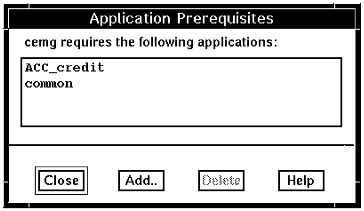
The system displays the Application Prerequisites window.

- Deleting application prerequisites: Click the applications that are no longer required.
- Click Delete.
The system removes the applications from the list in the Add Application Prerequisites window. The applications are not deleted from the system.