- From the Welcome window, select Configuration —> Languages.
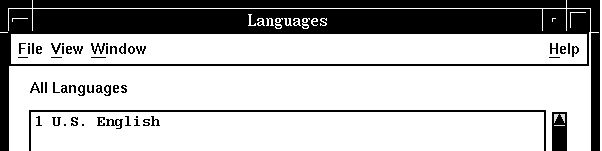
- Listing the existing languages: To see all the existing
languages, ensure that the displayed list of languages is titled "All Languages."
If it is not, click View —> All Languages.
The system lists all the languages in the system.
- To see only the languages of one type, click View —> Window
Text Languages or Voice Languages.
The system lists all languages of the type you selected.
- Creating a new language definition: Click File —>
New.
The system displays the Language window:
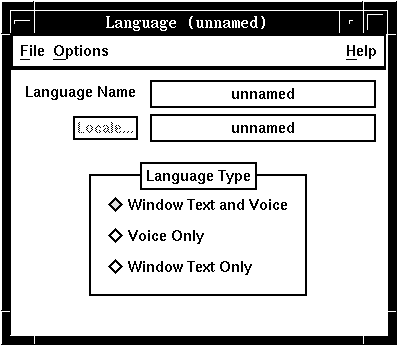
- Defining the language type: Click the button that is next to the language type that applies to the new language.
- Click File —>Save.
The system displays the Language Save As window:
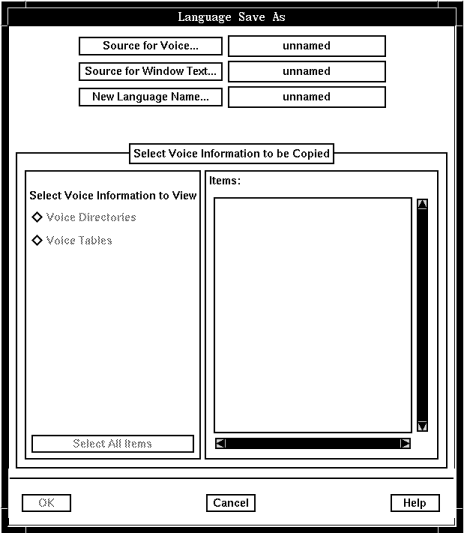
- Selecting the voice database to copy: If the language
is a Voice language, click Source for Voice....
The system lists all languages that are now defined as either Voice Only, or Voice and Window Text languages.
- Click the language database to copy.
- Click OK.
The system displays the Language Save As window. If the new language is also a Window Text language, the source language that is chosen for voice is filled in as the Source for Window Text.
- Selecting directories: To select individual
voice directories to copy, click the button that is next to Voice Directories.
The system lists all directories in the selected database.
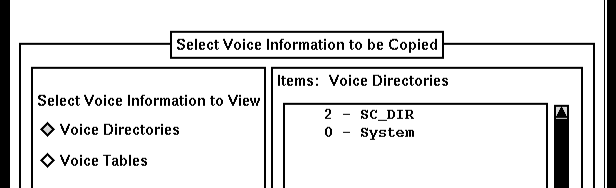
- Click the directories that are to be copied.
- Copying everything: If you want to copy all the directories and tables, click Select All.
- Selecting a window text database to copy: To change the window text database, click Source for Window Text....
- The system lists all languages that are now defined as either Window Text or Voice and Window Text languages.
- Click the language database that you want to copy.
- Click OK.
- Naming the new language: Click New Language
Name...
The system lists the available language names.
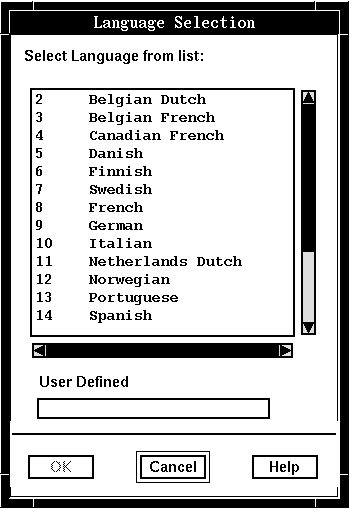
- Using an existing name: To use an existing name for the language, click the name you want to assign to the new language.
- Click OK.
The system assigns the name to the new language.
- Creating your own name: To create your own name for the language, type the name in the User Defined field.
- Click OK.
The system displays the Language Save As window showing the source languages, the new language name, and the language code.
- Changing the code: To change the code for a language you named, click the code, delete it, and type a new code.
- Saving the definition: Click OK.
If you named the language yourself and changed the language code, but another language is already identified by the same code, the system displays the available codes. Otherwise, it assigns the new code to the language. Without reference to how you named the language, the system adds the language. This operation might take a few minutes.
- Changing the locale: To change the locale, click Locale...
The system displays a list of locales.
- Click the locale.
- Click OK.
The system displays the Language window with the new locale.
- Save the new language.
Although the Language window remains displayed, the system has saved the new language definition and created the requested database. When you Close the Language window, you see the new language on the list of languages.