- From the Welcome window, select Configuration —>
Pack Configuration —> Change
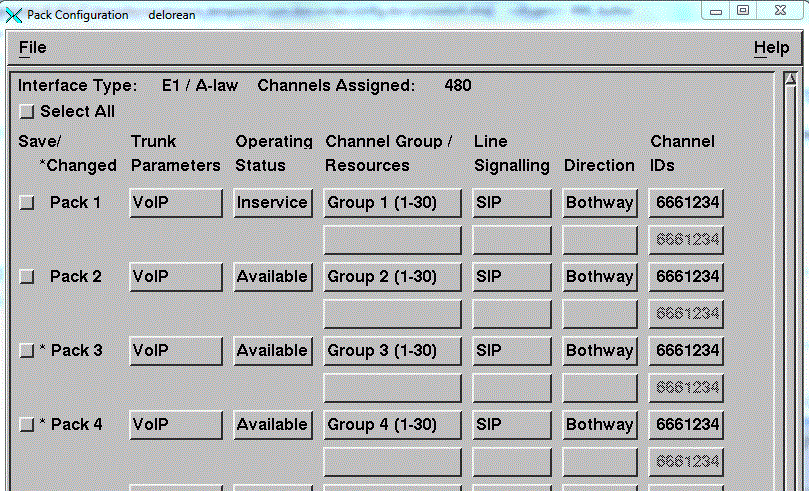
- Setting
the initial operating status of the pack: The Operating
Status determines the state into which the pack is placed
whenever Blueworx Voice Response is
started. To change the operating status, click the Operating
Status button.
The operating status selection window is displayed:
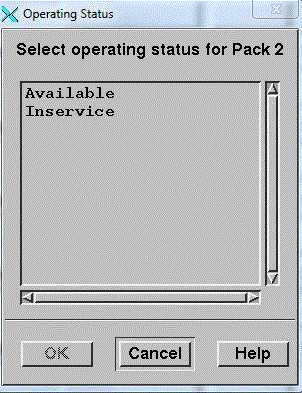
- Click the required operating status. Possible values are:
- Inservice
- The pack is ready to process calls. The channels are set to Inservice; ready to make or receive calls. Inservice is the normal setting when you are using the system in production.
- Available
- The VoIP trunk is present but is not ready to communicate with the network. The trunk is not ready to process calls until you enable the pack and set the channels In Service (Operations —> System Monitor). You can configure the relevant pack by using the buttons to the right of this one.
- Click OK to confirm your update.
The Operating Status button displays your selection.
- Allocating channels to channel groups: The two Channel Group
buttons for each pack show which of the 30 channels on the trunk are allocated to which channel
groups.
If, for example, a channel group button displays Group 4 (1-10), this means that channels 1 to 10 have been allocated to channel group 4.
Two Channel Group buttons are provided so that you can allocate some channels to one channel group and some to another. You might want to do this if some channels are to be used exclusively for incoming calls and some exclusively for outgoing calls. For further information on Channel Groups, see Supporting one or more protocols.
Note: If you want to divide the channels on one trunk to more than two channel groups, you must complete the definition of the two groups you have now started on, save the configuration, close the Pack Configuration window, and then open it again. You can then define the characteristics of two more channel groups on this trunk.To change the existing allocation of channels to channel groups, click either of the Channel Group buttons. (The buttons are grayed out if the operating status is set to Defined.)
The Channel Group Selection window is displayed, showing both channel groups:
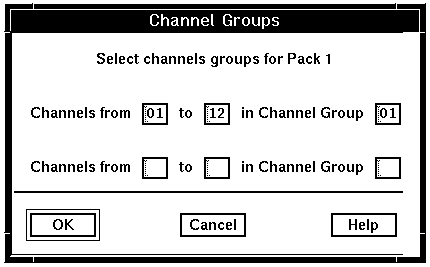
- Enter or update channel allocations as required:
- To allocate all the channels on a trunk to one channel group, enter the lowest and highest channel numbers, and the required channel group number, on a single line. Leave the other line blank by deleting any data shown.
- To allocate some channels to one group and some to another, ensure that the two ranges of channels do not overlap. For example, allocate channels 1 through 12 to one group and 13 through 30 to the other.
- Click OK to confirm the update.
You are returned to the main Pack Configuration window. Your new channel assignments are now shown on the Channel Group buttons.
- Setting call direction: The Direction buttons show the
direction settings of the two channel groups. To change the channel group's call direction, click
the appropriate button.
The Call Direction window is displayed:
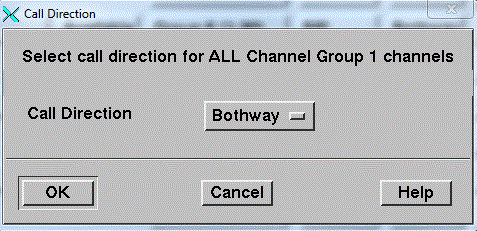
- The Direction button determines whether Blueworx Voice Response can both make and receive calls. Possible values
are:
- Outgoing: Blueworx Voice Response can make calls but does not answer incoming calls.
- Incoming: Blueworx Voice Response can only receive calls; it cannot make them.
- Bothway: No restriction has been put on this channel group.
- Click OK to complete the update.
You are returned to the main Pack Configuration window.
- Configuring other packs: If you have more than one pack installed in your system, repeat Steps 2 to 11 for each of the other packs.
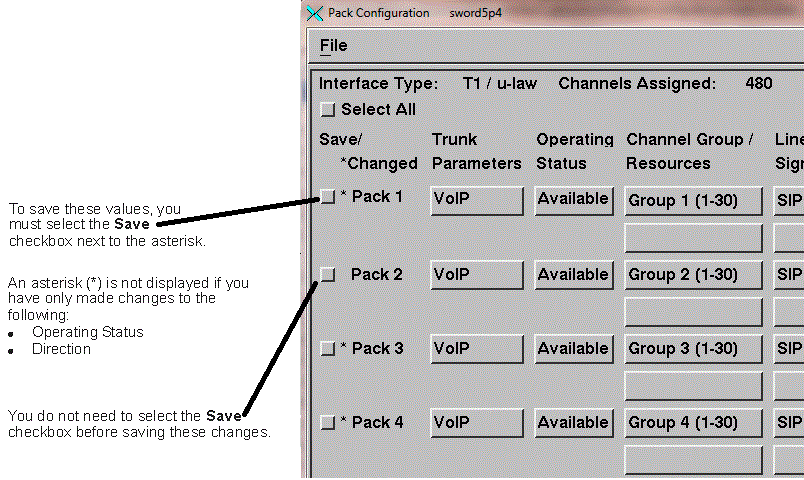
- Saving your changes: An asterisk (*) is displayed next
to the pack identifier if you have changed the values of any of the
following:
- Channel Group/Resources
Attention: If you select the Save checkbox, other system parameter values might be reset to default values, undoing any work done using System Configuration.If you do not want this to happen, do not select the Save checkbox, even if you haven't made any changes.
- Click File —> Save.
In this example, all changes made to pack 1A are saved and many other system parameters are reset. For pack 1B, changes made to Operating Status, Direction, Address Signaling, and Telephone Numbers are saved but no other system parameters are reset.
- Click File —> Close.
You are returned to the Welcome window.
The new configuration for each pack takes effect when Blueworx Voice Response is next restarted.