Use this procedure to define a language-specific prompt by completely redefining all the statements in the prompt. Note that the inputs to the language-specific and default versions of a prompt, if any, must match exactly in number and type.
This task is only necessary when the logic of the default prompt must be changed for implementation in a selected language. Use this procedure when the logic requires major modification; for minor changes to the default version of the prompt, use the procedure in Modifying the default to create a language-specific prompt.
To define a language-specific prompt from scratch:
- From the Welcome window, click on Applications —> Prompts.
- Select the prompt directory and the prompt: Select the prompt directory that contains the default prompts for which you need language-specific versions.
- Open the prompt for which
you want to define a language-specific version.
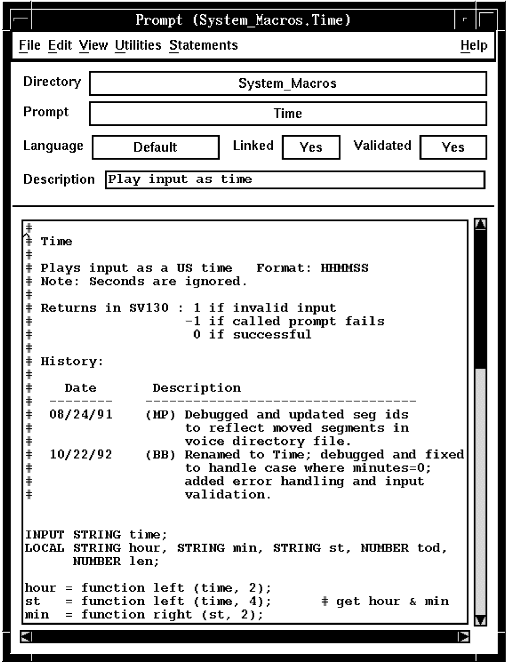
The system displays the Prompt window, showing the selected prompt:

- If the default prompt is not displayed in the Prompt window, click View —> Default.
- Define language: Click Utilities —> Derive
Language to select a defined language.
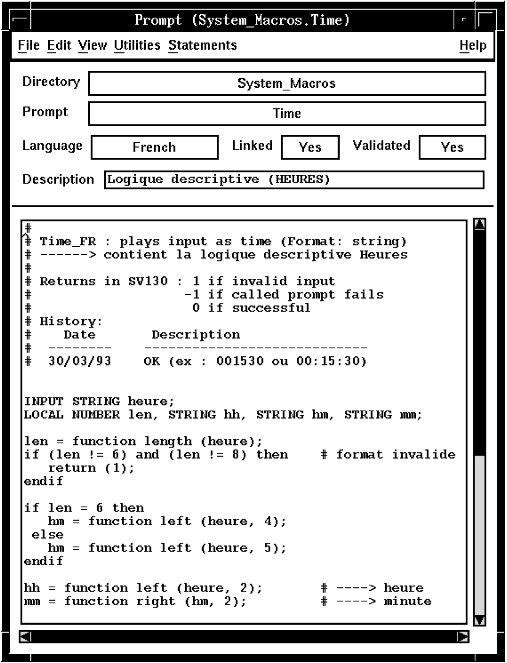
The system displays a new Prompt window for the selected language, showing an INPUT statement for required input parameters, if any.
Note that if the prompt already exists for the selected language, the system displays the existing prompt:

- Add prompt statements: Add prompt statements in one of
the following ways:
- Add the prompt statements manually.
- Or, select the required prompt statements that follow the INPUT statement from the Statements menu. For details of prompt statements, see Prompt statements.
- Or, click Utilities —> Import to import a prompt (in ASCII format) from a file in the AIX filesystem to Blueworx Voice Response. See Importing prompts.
To insert a new statement at a selected position, move the cursor to the statement that will precede the added statement. To insert a statement as the first entry in the prompt, move the cursor to the left of the first statement and press Enter to open a new line.
Refer to Editing prompts for instructions about modifying the information you create.
- Validate the prompt: Click the File menu
to Validate the prompt.
If the prompt syntax is valid, the Validated field displays Yes. An application that includes this prompt will not execute unless this field displays Yes.
If all references to voice tables, voice directories, and prompts are valid, the Linked field displays Yes. An application that includes this prompt will execute whether or not this field displays Yes.
- Save the prompt: After you have corrected any errors, Save the new language-specific prompt.
- Copy the prompt to other languages: To copy the prompt
you have created into other languages, click File —>
Save As. The system displays the Prompt Information
window.
In the Prompt Information Window:
- Click New Language Specific Prompt.
- Select the required language.
You can also reselect the directory or prompt to create this language-specific version for default prompts in other directories. This copies the language-specific prompt you have defined into the selected directories, associated with the selected default prompts.
- Click OK
The Prompt window title shows the prompt directory and name. The Language field shows the selected language.
- Close the Prompt window.
The list of prompts in the Prompts window is unchanged. To view the language-specific version of a prompt, you Open the prompt, then select the required language from the View menu.
- More?: Repeat this procedure, starting with Step 3, for each language-specific prompt that you want to define from scratch.