The three methods for creating application profiles are described.
- Start from the Application window (see Figure 1), which displays the other objects in your application (see Creating and managing application objects). In the Application window click Object —> New —> Application Profile . The advantage of this method is that the resulting application profile is created in the same application. This is the method described in this procedure.
- In the Configuration window click Application Profiles —> File —> New. Application profiles created in this way are put into the User application. You then need to move them to the appropriate applications as necessary.
- Use the wvrapplprof command, as described in wvrapplprof command. Application profiles created in this way are put into the User application and can then be moved to the appropriate application, if necessary.
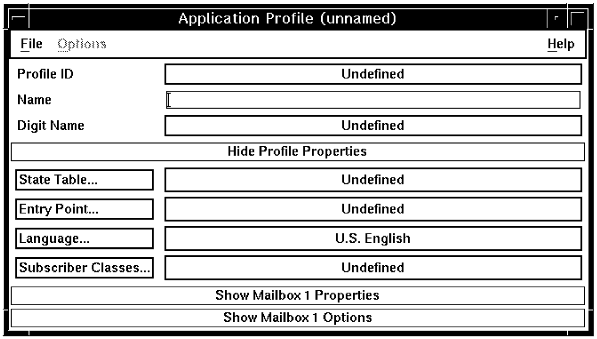
- Naming the profile : Type a unique
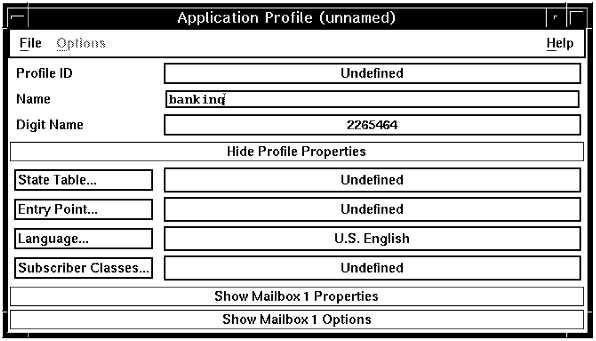
name in the Name field. The name can be up to 50 characters long,
including blanks.
As you type, you’ll see digits appearing in the Digit Name field. This is the numeric equivalent of the name. The digit name is used by the GetFindName action to find an application profile that matches digits keyed in by the caller. You need to be aware that the digit name is used in this way, to help you determine what profile names should be allowed. You can’t have two profile names whose corresponding digit names are the same, because each digit name must be unique.
For example, if you have a profile called AAA, you cannot have a profile called BBB unless A and B are mapped to different keys on the telephone keypad. (For more information, see Entering data (multiple keys).)
- Specifying the initial state table for the application
: Click the State Table pushbutton.
The system lists all validated state tables.
- Click the appropriate state table. If you have implemented your application as a set of state tables, click the main state table that includes the first part of the interaction with the caller.
- Click OK.
- Specifying an entry point: If the state table you
selected has only one entry point, that entry point is listed in the Entry Point field. If the state table has more than one entry point,
the Entry Point is Undefined, in which case you must specify
one. Click the Entry Point pushbutton.
The system lists all defined entry points in the state table.
- Click the entry point at which this application starts.
- Click OK.
-
Changing the language (optional): The language listed is the language identified as the language specified in the administrator profile for the ID you used to log on. The language specifies which language database to use. The state table can be the same for all languages: only the application profiles, prompts, and voice segments are language-specific.
Click the Language pushbutton.The system lists all defined languages in the system.
- Click the language in which this application runs.
- Click OK.
-
Specifying subscriber classes (optional): Subscriber classes are used for controlling the use of mailboxes.
Click the Subscriber Classes pushbutton.The system lists the subscriber classes.
- Click a subscriber class.
- Click OK.
- Entering the profile ID: Click File —> Save.
The system prompts you for a profile ID.
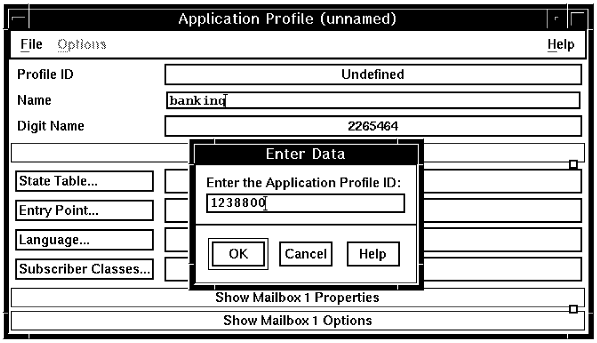
The profile ID can be up to 20 characters long and can include any characters valid for a telephone number (the digits 0 through 9 and the letters A, B, C, and D). Blueworx Voice Response does not accept blanks or special characters as part of the profile ID.
The profile ID depends on how you intend the application profile to be used:
- For a state table that is to handle incoming calls when the called number is available, it should be the number callers are to dial to reach this application (the called number).
- For a state table to be used to handle all incoming calls on a specific channel, or channels, when the called number is unavailable, it should be the channel identification, as specified in the Pack Configuration window.
- For a state table to be used if an application profile matching the called number or the channel identification cannot be found, it should be the value of the System Default Application Profile parameter.
- If the application profile is not to be used to identify a state table
to handle incoming calls, you can choose any valid value to identify it.
Note: In a voice mail system, the profile ID is typically the extension number of the subscriber, and the state table is the main state table of the voice mail application.
- Click OK.
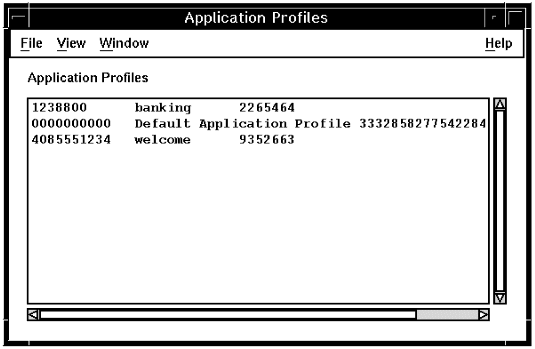
- In the Application window, click View —> Refresh.
The system displays the Application Profiles folder.
- Single-click on the folder icon to display the new Application Profile
icon inside it.
The new profile is also listed in the Application Profiles window:Up to 250,000 application profiles can be displayed in the Application Profiles window. If you have more this number, use the command line tool wvrapplprof to manage the application profiles, as described in wvrapplprof command.
The Application Profile window is still open, so that you can create further application profiles or, if necessary, continue with the procedure in Creating mailboxes for application use. (If you prefer, you can add mailboxes later.)
Note: You can create a profile to use as a template, editing it and saving it as a new profile when necessary.